Monday, July 1, 2019

What are different kinds of video connectors on a computer

There are a bunch of connectors available now a days on laptops and desktops. How to identify them quickly.

1.  HDMI  --This is one of the most popular connectors now a days.


If you see the symbol above, that is an HDMI.


2.  DisplayPort :  Some computers will have DisplayPort interface. So if you see a symbol with a "D" and two "+" signs its a displayport.


3. Mini Displayport.   There is also a connector called mini displayport. 


 A firewire port would also look like the same and they are mostly compatible.
4. DVI Single link and double link.


5. VGA. This is our plain old VGA. 


If your computer got a display interface different from your monitor, you may be able to buy a convertor cable. ie  DVI to VGA for instance.


Friday, June 28, 2019

How to survive without AntiVirus software

So you don't have anti virus software installed and you don't want it for whatever reason. How could you stay away from viruses?

There are many free anti virus software available and you can stay out of trouble reasonably well. One of them is Eset Online Scanner. www.eset.com/Online/Scanner. Eset is a very good product and their online scan is free. Clicking the link will download their online scanner.


   Click on the run button and you will get following screens and that's it. Eset will scan your machine and remove any viruses


  Its not a replacement for live anti virus software. So periodically you need to run this manually.

Wednesday, June 26, 2019

How to make hidden folders visible in Windows 10, Windows 7, Windows 8

In order to make hidden folders visible you need to run the "Folder Options".  There are couple ways to do it. The quick and easy way is:

Step 1:   Click on Windows button 
( Win 7 ) or   Search field on Windows 10   
               and  type in "Folder Options"  and folder options will be shown.


Step 2 :  On the Folder Options box click on the "Show hidden files, folders and drives" as shown below.


Saturday, June 29, 2013

cheap mobile internet

So you want to access internet on the road but do not want to pay the expensive monthly fee these mobile carriers charge!  What can you do?  If you want to access internet on your cell phone there is no way but to get a data plan from the carrier.  If you are  carrying a laptop around, then there is a way!


   Virgin mobile offers BroadBand2Go plans. You have to buy the above 3G/4G modem. There are several plans available with no contract like $5/Day for 200MB.  $30/Month for 2GB etc.  I used this service and it works quite well.

You can find more information on http://www.virginmobileusa.com/mobile-broadband-plans/broadband-2-go/overview/

A nice article on different mobile internet options.

http://www.pcworld.com/article/168186/mobile_computing.html


Tuesday, June 25, 2013

How to take apart DELL Inspiron N 5110

This laptop is relatively easy to take apart. One thing I noted is that, in order to access the hard drive of this laptop, one has to take apart the whole thing. I have no clue why DELL designed it this way. Okay here you go!

1. Remove the battery. Press the power button to discharge anything left out.  Remove all the screws from the back. There are two hidden screws  on the back where there are rubber bushes. You have to take out those with screw driver to remove the screws. See in the pic where they are located. There is one on the other end as well. Also remove the memory cover and remove the memories as well.

Remove the CD drive as well. put a credit card in between the space where the cd drive joins the body and push with the card it comes off.

2. You made so far!  Let go to the keyboard. One of the easiest keyboard removal so far I found.
    There are 4 tab latches on the top edge of the keyboard that attaches it to the body of the laptop. With flat head screw driver gently press on those tabs one by one and the keyboard pops out.  ( Please see the red markings. 3 of them are marked. 1 is on the end of it ).  The bottom side of the keyboard got tabs which is inserted in the body. Gently wiggle a little bit and pull upwards to get the keyboard out. As always no excessive force!


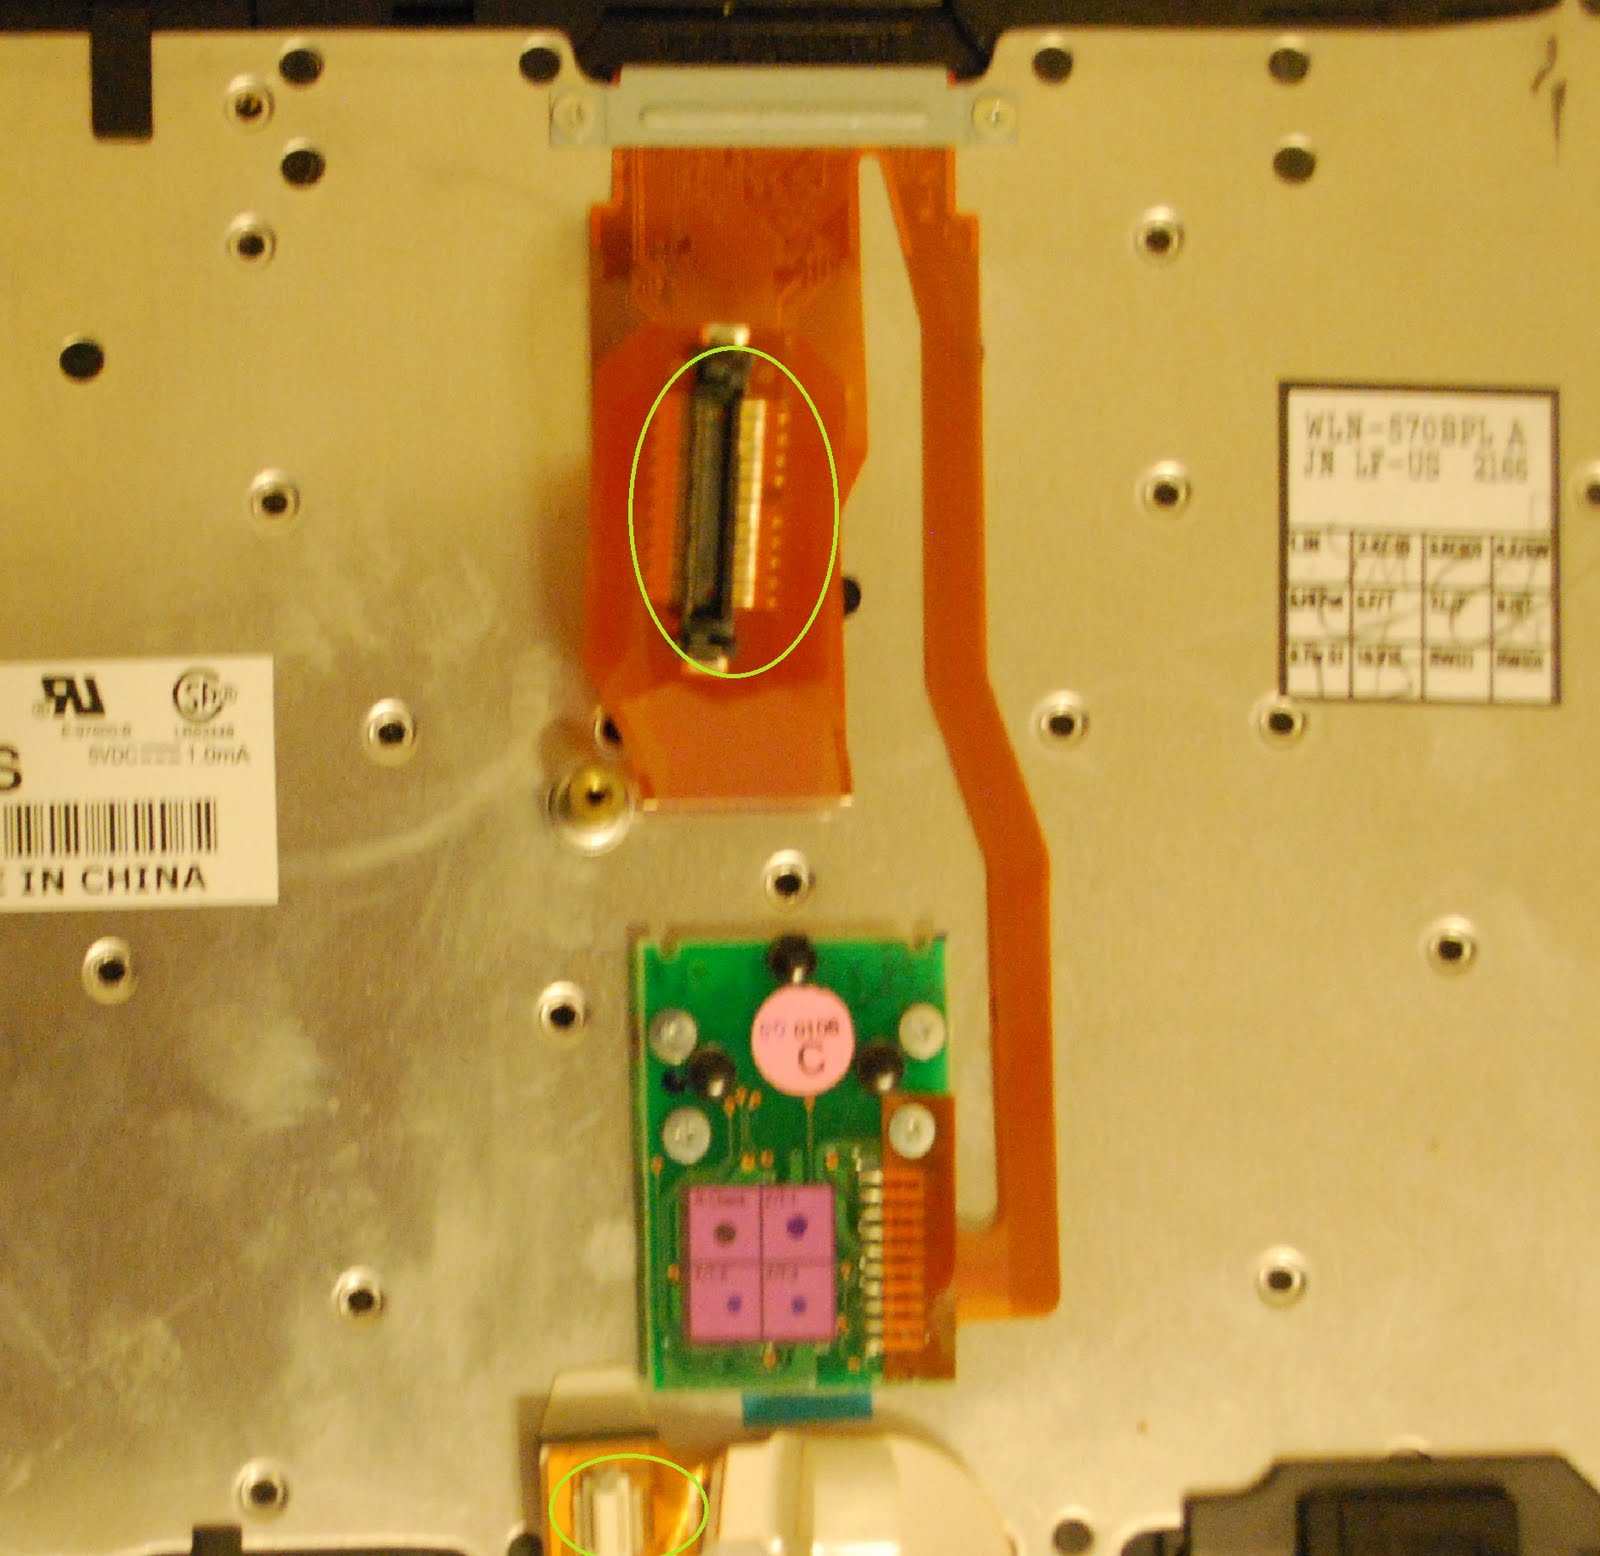
3.  Lets removed the keyboard cable. Lift up the black latch on the cable using a flat bed screw driver gently. Alls the zif cables are on the laptop are like this. You have to lift up the black latch on it get the cable out.


4. Lets remove the top cover. Remove the three zif connectors and marked on the pic. Also remove the screws. Using a pry tool ( A credit card might work. Or a flat bed screw driver) gently pry on the top cover
to remove the top cover. You can insert your finger through the CD bay and give gently push as well. Now you have access to the main board.


5. Remove the screen.   Remove the screen cable on the left, by gently pulling toward the screen. Unscrew the screws where screen is secured.  Remove the wireless antenna  cables from the board. lift up the screen.
See the next picture to see things are marked.


6. Removing the board. Remove the speaker cable on the bottom. Remove the marked screws.  Gently life the board up. The board is connectd to the 2 sub boards with connectors. On the right top side where wireless card is. And on the left top where VGA connector is. you have to give gentle pressure up on the joining areas( ie where the main board meet those boards)


  Not that there are arrow marking on the board where screws are secured on the board.( Other wholes are for the screws coming from back or from the front cover).


  All set. You can now take the board from the bottom cover.

Thanks for reading.
We assume no responsibility for anything happens from following these instructions. Use at your own risk,


Wednesday, October 27, 2010

How to launch Remote Assistance in Vista/Win 7

Remote Assistance can be launched from command line or through the menus.

Click on Start type in "MSRA" and enter.


Wednesday, October 20, 2010

How to dismantle/Deassemble IBM ThinkPad R51

Disclosure. We assume no responsibility of any damage by following the below procedure.


How to dismantle IBM Thinkpad R51.
This model is relatively easy.

1. Keep the laptop upside down. Remove all the screws from the bottom. There are a lot of screws in different sizes. Its a good idea to mark which screw is where. Remove the memory.

2. Turn the laptop and open the screen. Using a pry tool slowly pry into the sides of the body to
lift up the whole top portion. You have to remove the keyboard and the top cover together. (Most other laptop's keyboard can be reomoved separately). See the picture below.


Lift up the top portion. Be careful there are 2 cables connected the motherboard. Gently pull them out. Picture of the bottom of the top cover is given with cables marked. Remove the smaller cable first, so that you get access to the other cable.


Good luck.
Sam
Computer Repair in Las Vegas ,
Laptop Repair in Las Vegas.